Headset Guide
Note! This documentation is work in progress and will be updated continuously.
Turning application on
On first start-up you will need to give the application permissions to use your gaze (to enable gaze activated information visuals around battery status indicator, for example) and to access the microphone (not necessary at this stage, as AirHUD™ currently doesn't use any voice commands).
The path to turn the application on is different for each headset, but how you can access the application for all of them is specified in the Installation section. Please first review the Installation section for your headset.
Wait for the application to start. You also need to accept the Terms of Service agreement presented to you to continue. Declining the Terms of Service will exit the application. Once started properly, you will see a round map in front of you, and several AirHUD™ information and control panels around you.
Establishing connections
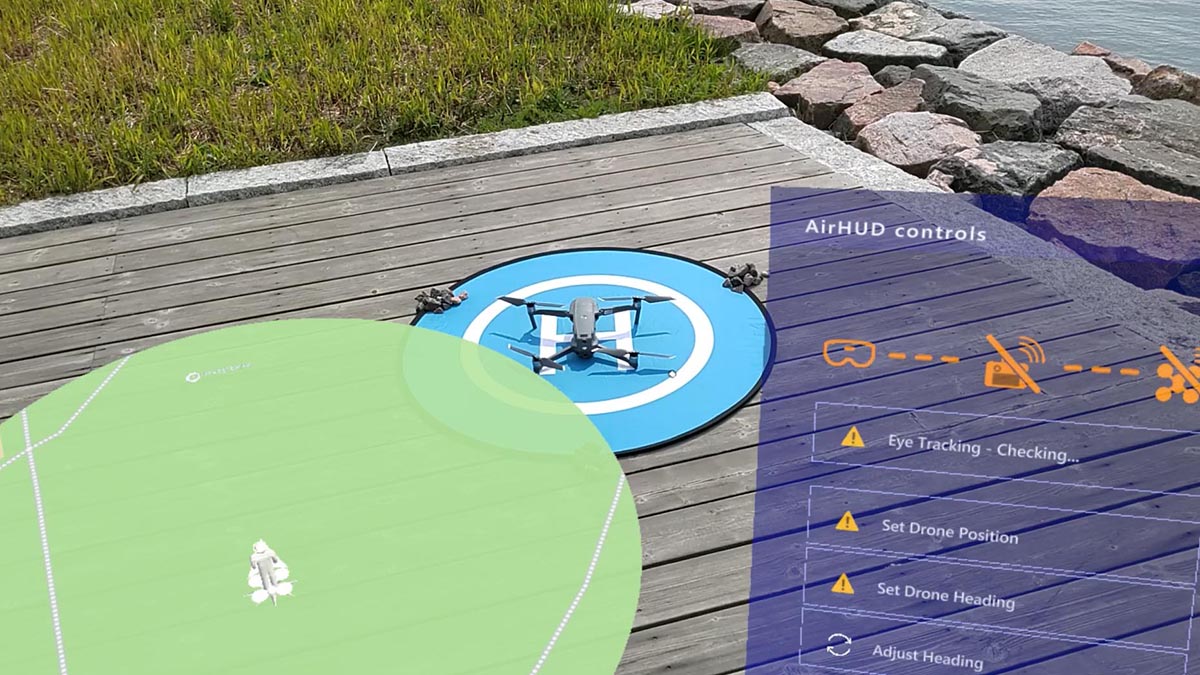
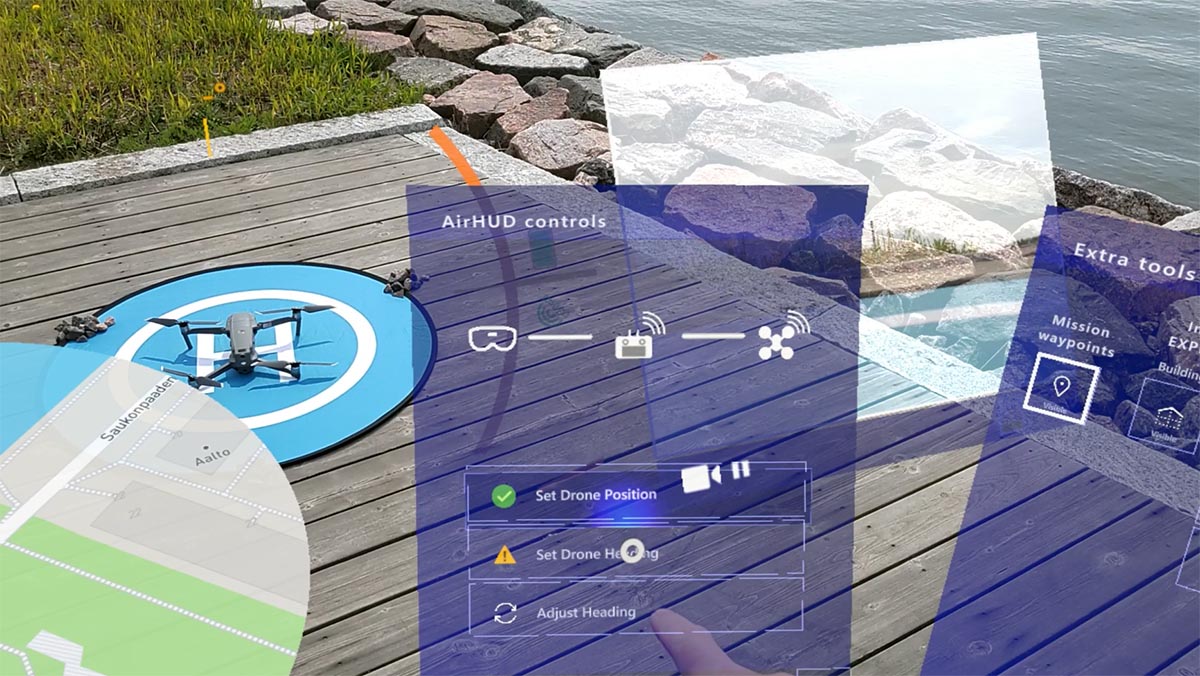
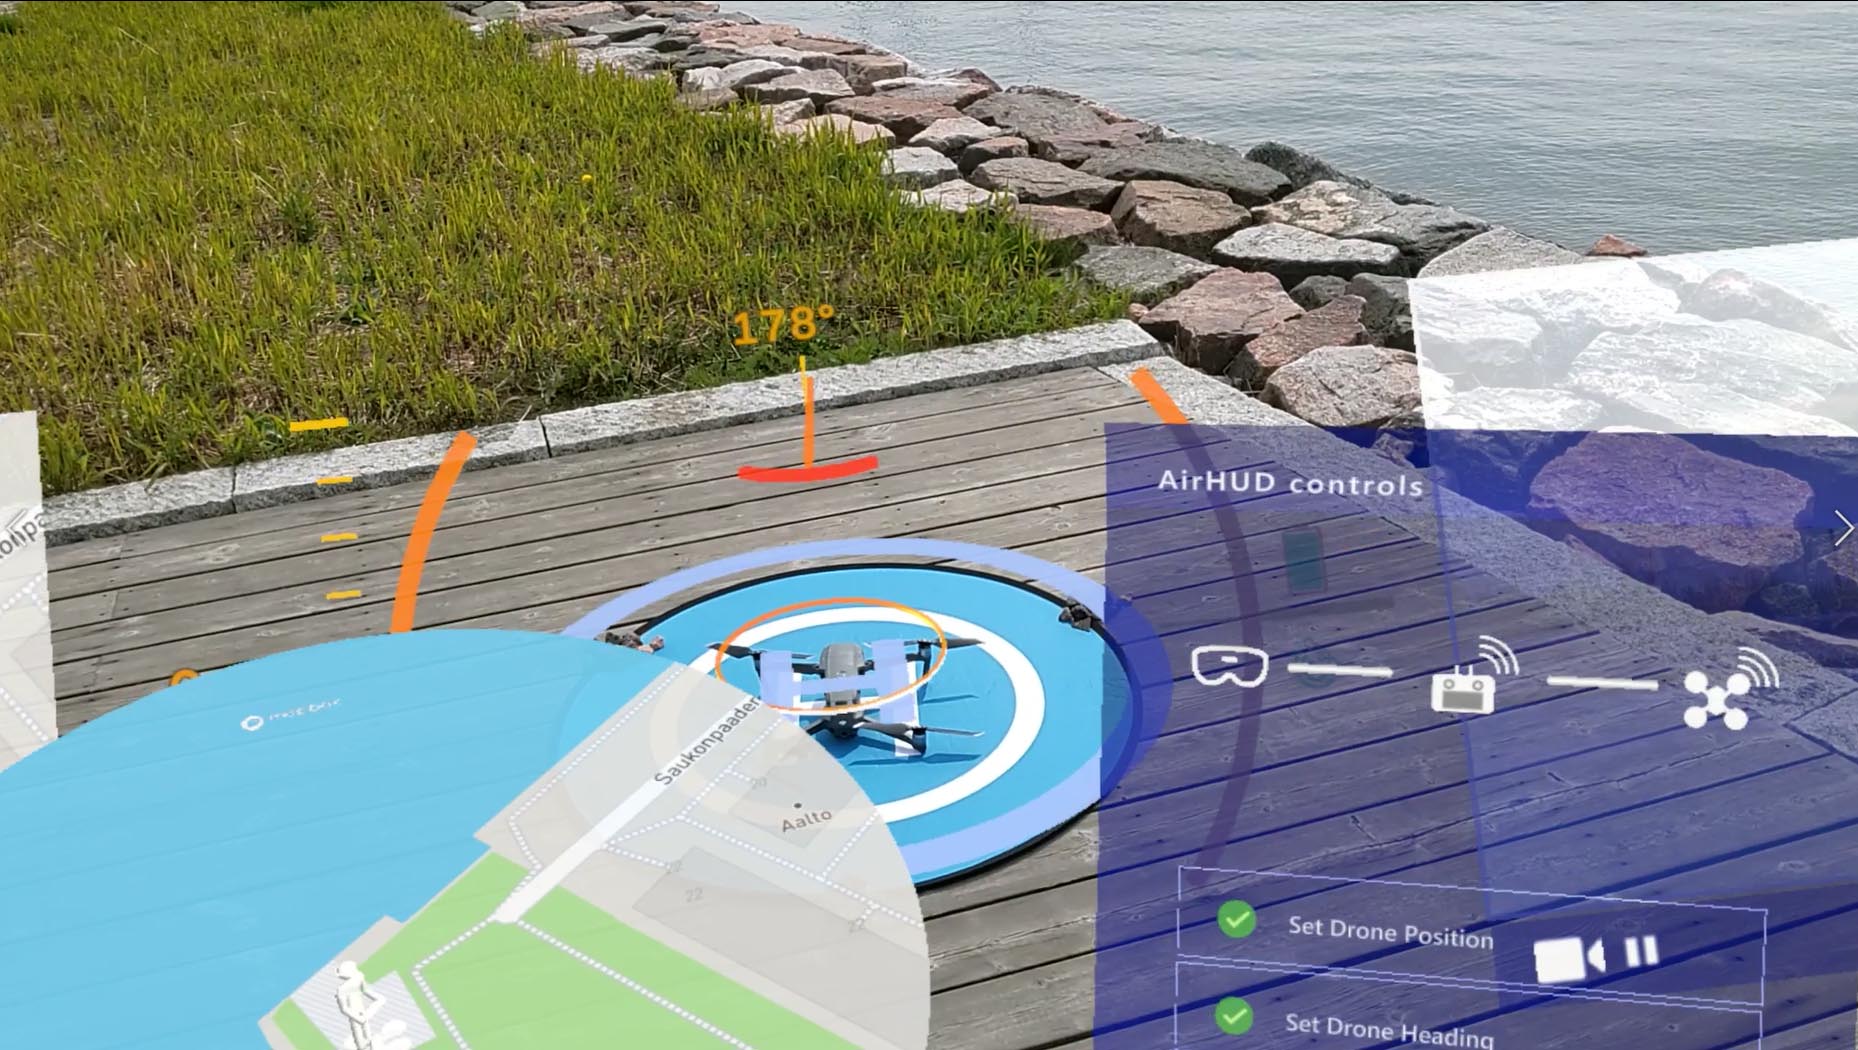
Once the application has started, it will automatically start to detect the connections between the HoloLens, the drone controller and the drone. These connection statuses are shown on the top part of the AirHUD™ controls panel, as seen in the picture above. In this picture, no connections are established, and HoloLens eye tracking capability is being checked, so all parts are shown in warning orange. Please wait a bit for the connections to be established. NOTE: The drone controller and the drone itself will need to be powered up at this stage, and the controller and HoloLens need to be in the same Wifi network.
IMPORTANT: After the application has started the HoloLens spatial awareness system needs to be shown and taught a bit about the surroundings. Please look around you on the ground and around the drone, even walking a few steps to the drone and back while looking downwards. This way the HoloLens can scan the ground level, which is a crucial element of the whole AirHUD™ application world understanding.
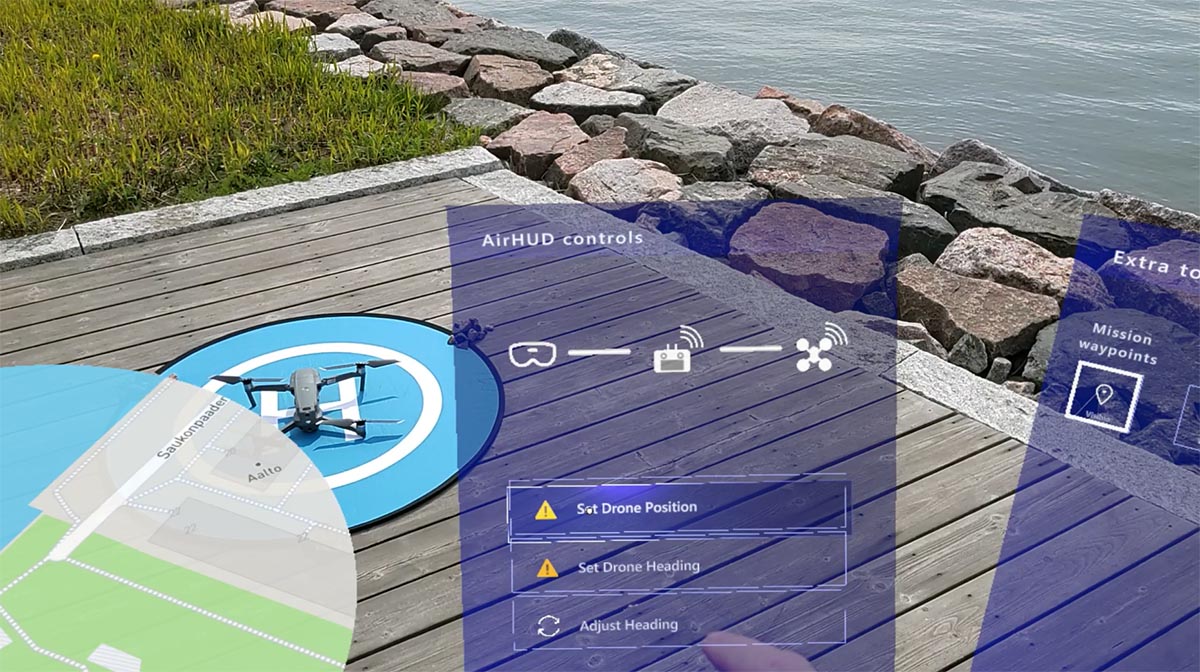
Once the connections are ok, as seen in the picture above with all white connection indicators, you can start the initial calibration steps.
Setting drone position
The AirHUD™ application needs to be shown where the drone actually is, so you need to select "Set drone position" from the AirHUD™ controls panel.
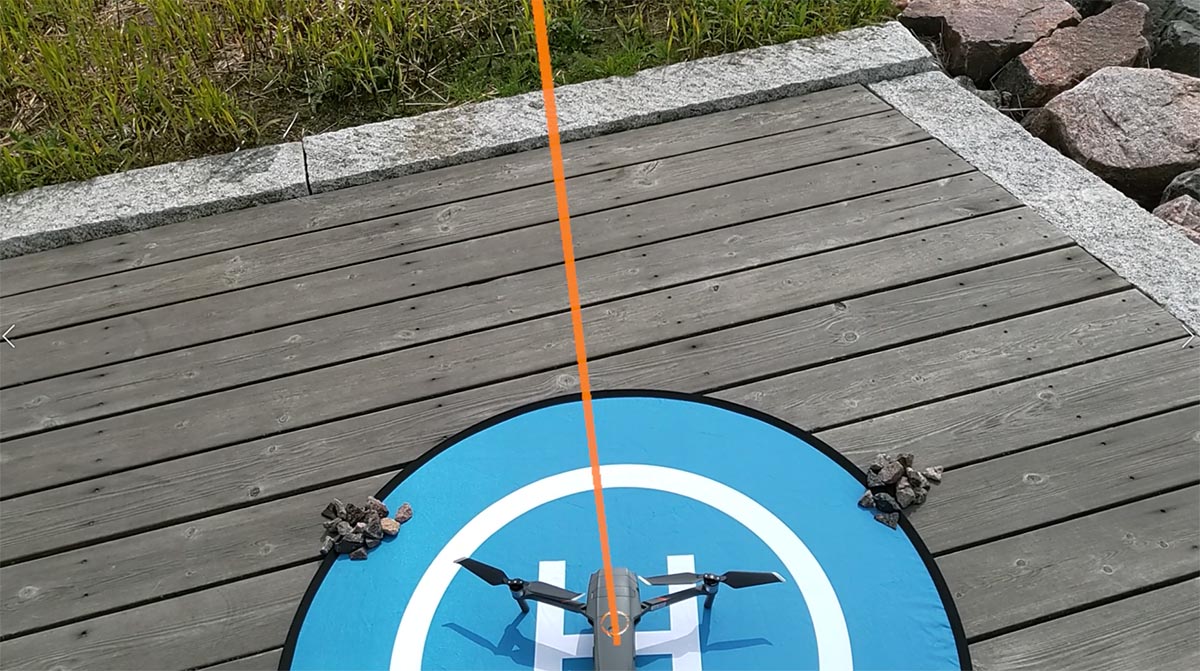
Setting drone position is achieved by moving a vertical orange positioning rod to stand in the middle of the drone. Once the "Set drone position" button is pressed, the whole AirHUD™ UI will disappear, and only the rod will be floating in front of you, as shown in the picture below.
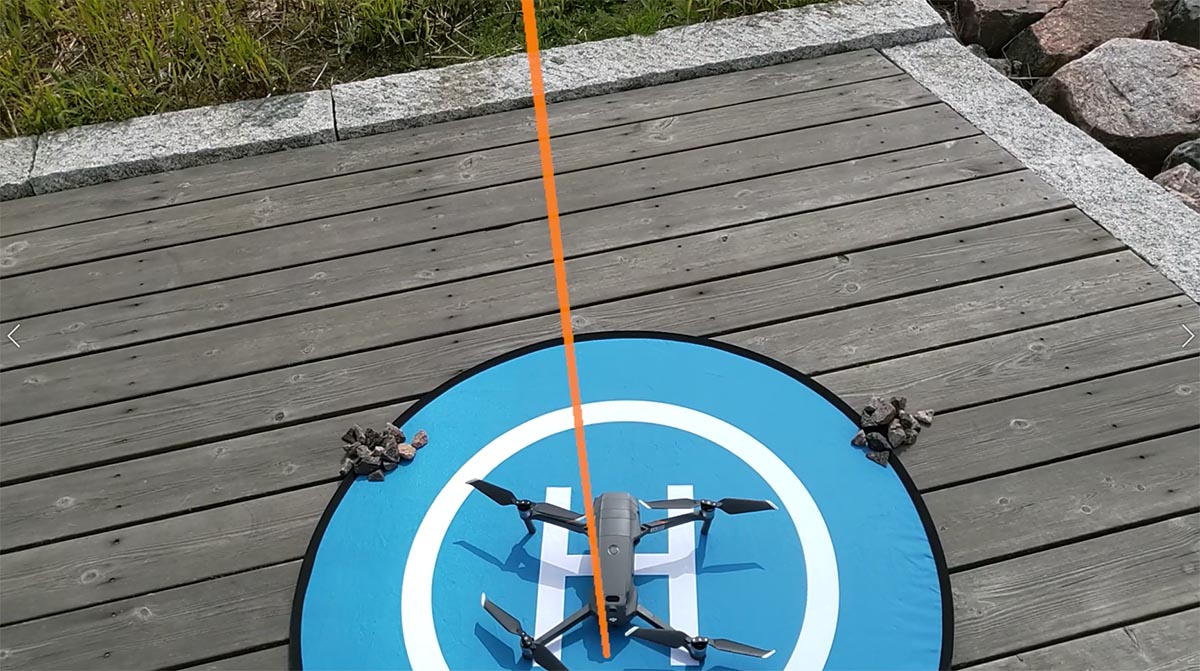
The rod is "attached" to your body, or more accurately to the HoloLens position, so you now need to move yourself and look down at the drone to guide the rod into the center of the drone. Once you stop moving, you'll soon see a centering ring appear and start to shrink. This will indicate that centering is happening, but you can still move and the centering will be restarted once you stop again.
NOTE: If you can't see the rod in front of you reaching ground level, look up, you might find it is at your eye level. This means that the HoloLens had not gathered enough information of the surroundings to be able to determine a reliable ground level at this position. Let the centering ring shrink down at this position to re-enable the other UI panels, and then stop the application and restart it. Unfortunately that is currently the only way to restart ground level scanning in AirHUD™ application. A fix is in the works!
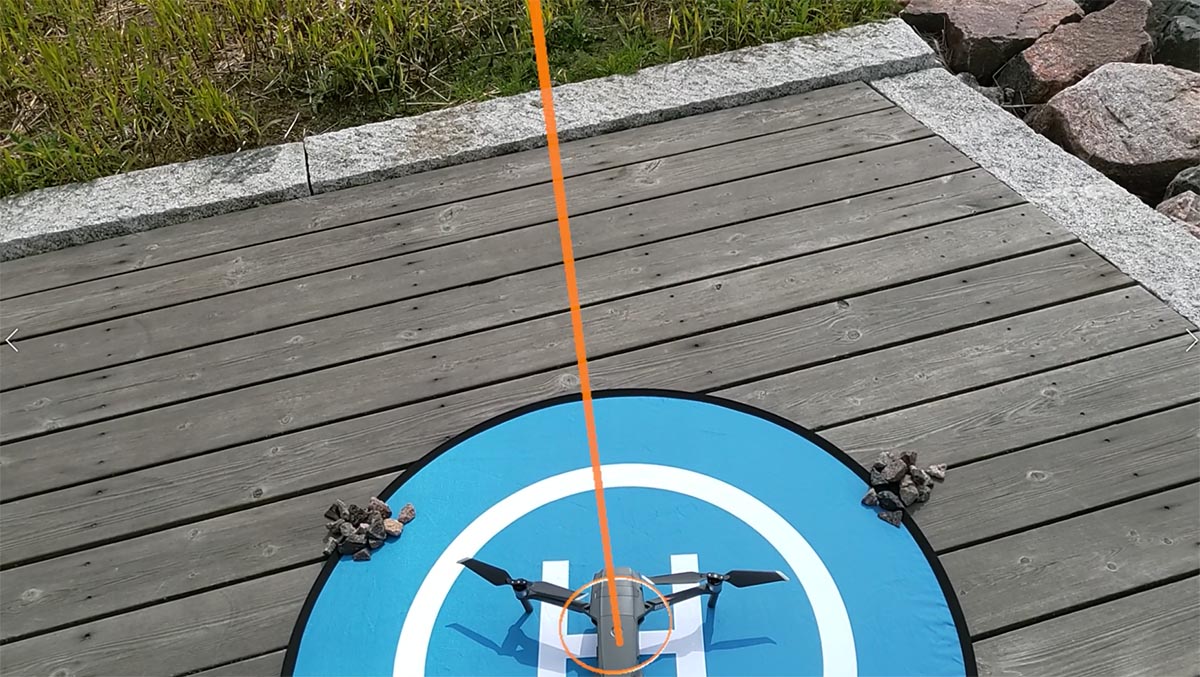
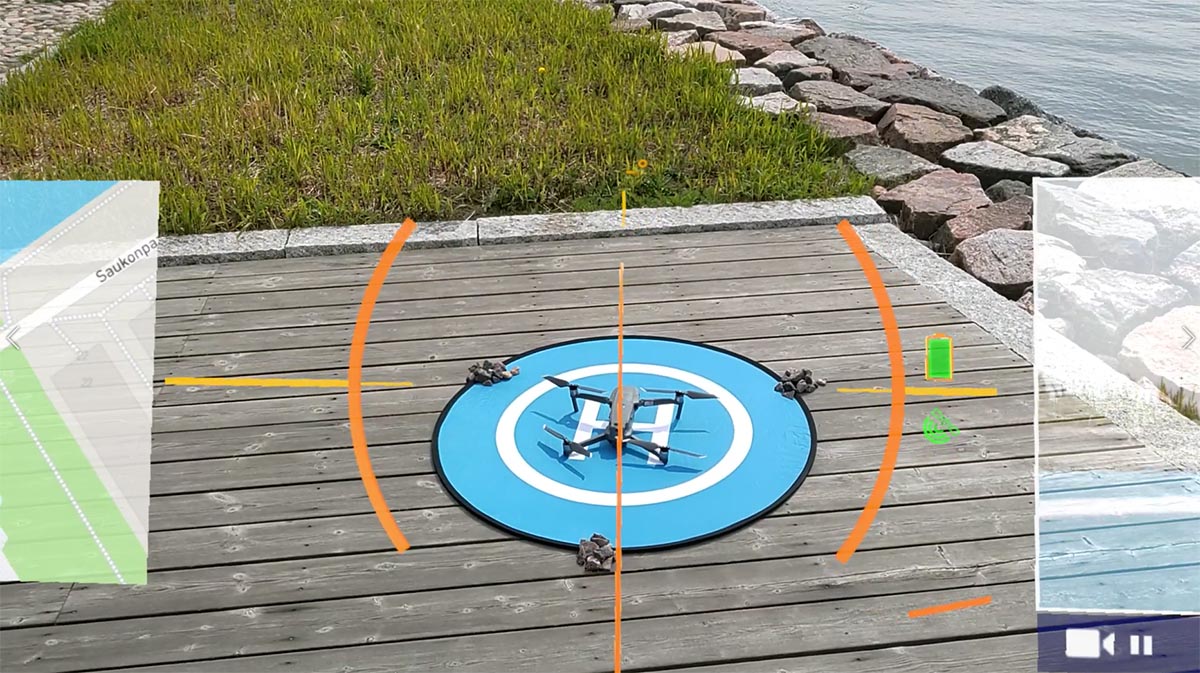
Above the centering indicator is nearly finished shrinking down and drone world position is about to be set. Once the position is confirmed, the drone will be surrounded by the AirHUD™ drone position indicators and the map will update to display current location. AirHUD™ now knows where we are at the world!
Setting drone heading
Next, and finally, we need to tell the AirHUD™ application which way the world is around us, and this is achieved by showing where the drone forward direction is pointing at. So, select "Set drone heading" from AirHUD™ controls panel.
The whole AirHUD™ UI will once again disappear, and now you will see the orange rod starting from where your feet are and going through the drone position set in the previous step.
You should now move sideways, and perhaps even a bit backwards so that the orange rod is perfectly aligned with forward direction of the drone. This needs precision, as even a slight misalignment will immediately show up when flying. This can be adjusted later, even while flying, but it is better to try to get good starting point already on the ground.
Again, once you stop moving, smaller centering rods will appear and will start to shrink towards the heading alignment rod. You can still move to realign, and the smaller rods will then reappear after a while of no movement.
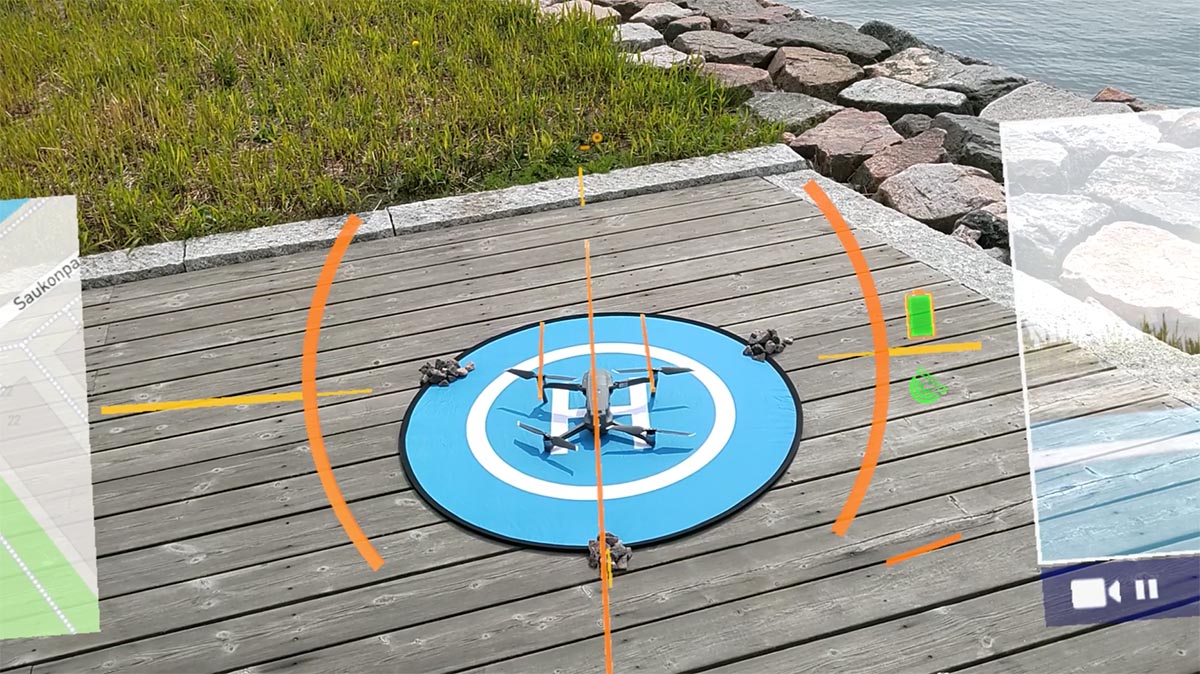
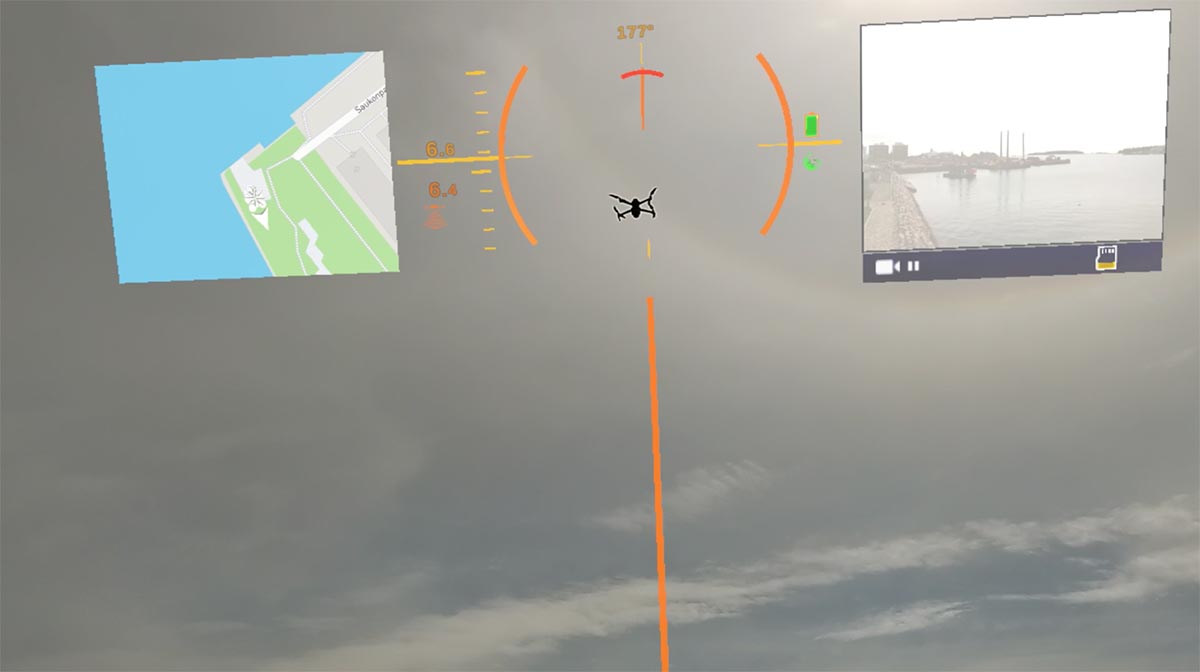
Now, when the drone heading is known, as shown with the heading indicator and numbers above the drone, we have full knowledge of the world as we now also now where North is. So the pilot and drone indicators are also now shown in the map.
Ready to fly
You are now all set to fly! All is now just normal drone operation, use the controller for flying the drone and enjoy AirHUD™ indicators following the drone into the sky!
NOTE: If you notice a heading misalignment while flying, which can be seen as constant separation of the indicators and the drone as distance grows, you can select "Adjust Heading" from AirHUD™ controls panel and change the alignment from the pop-up panel buttons that appear. This misalignment can also be caused by the drone getting better compass calibration after getting airborne, so is dependent on conditions and drone type.